Blog

  • Tai Chi for Arthritis: Gentle Relief That Works

    Tai Chi for Arthritis: Gentle Relief That Works

    When your joints ache, the last thing that sounds appealing is exercise — and yet movement is exactly what stiff, arthritic joints need most. That is the paradox tai chi for arthritis solves. Its movements are slow, continuous, and weight-bearing without being jarring, which lets you work a joint through its range of motion without the pounding that makes arthritis flare. At Global Martial Arts USA in Gallatin, TN, we have taught this practice to students managing everything from mild morning stiffness to long-standing knee osteoarthritis for more than 50 years.

    This guide covers why the practice suits arthritic joints so well, what the clinical research actually found, which types of arthritis respond best, and how to begin safely if you have never taken a class.

    Why Tai Chi Works for Arthritic Joints

    Arthritis creates a cycle that feeds itself. A joint hurts, so you use it less. Using it less weakens the muscles that support and cushion it, and the joint stiffens further from disuse — so the next time you move it, it hurts more. Breaking that cycle requires movement gentle enough that you will actually keep doing it.

    Tai chi fits that requirement almost perfectly. The movements are performed slowly and without impact, so there is no jolt traveling up through the knees, hips, or spine. Your knees stay softly bent through most of the form, which builds quadriceps and hip strength — the muscles that take load off an arthritic knee — while the joint itself moves under control rather than under shock. The continuous, circular arm and torso motions carry shoulders, elbows, wrists, and the spine through a full range of motion, which helps maintain the mobility that stiffness quietly erodes.

    There is a second benefit that surprises many new students: the deliberate, breath-paced quality of the practice tends to calm the nervous system, and pain that you meet in a calmer state is generally easier to tolerate. Practitioners often describe feeling looser after a session in a way that lasts well past the class itself.

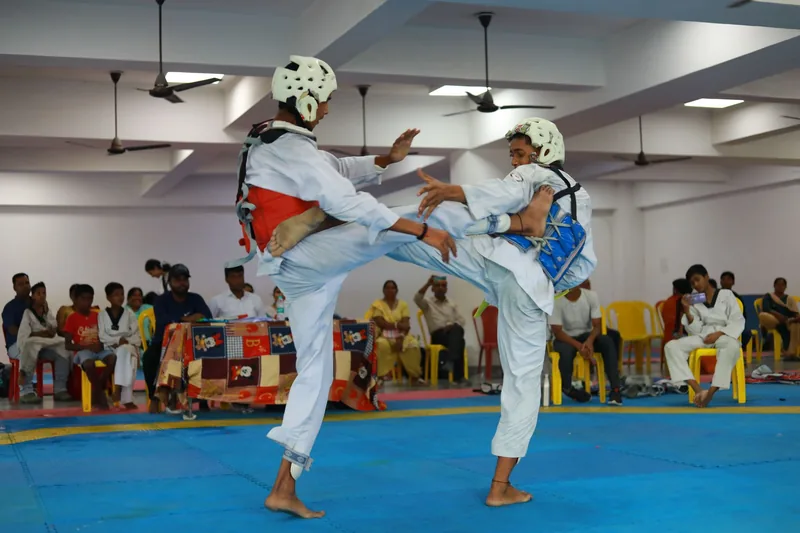
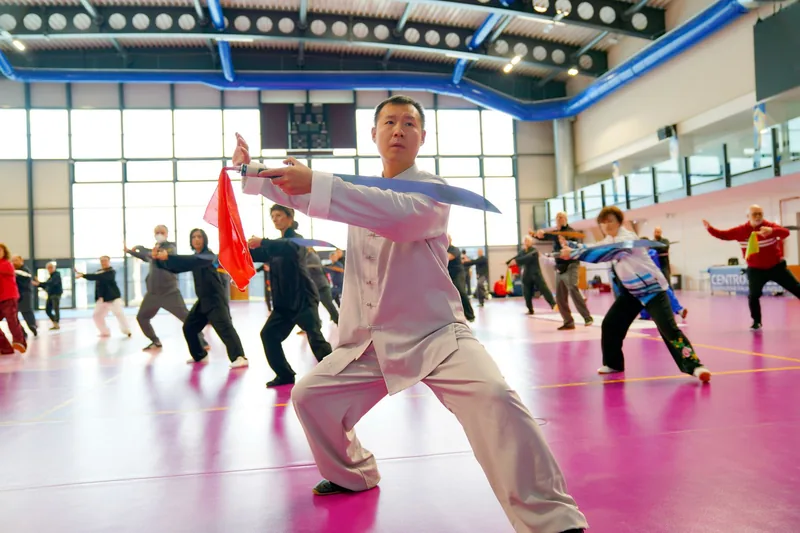
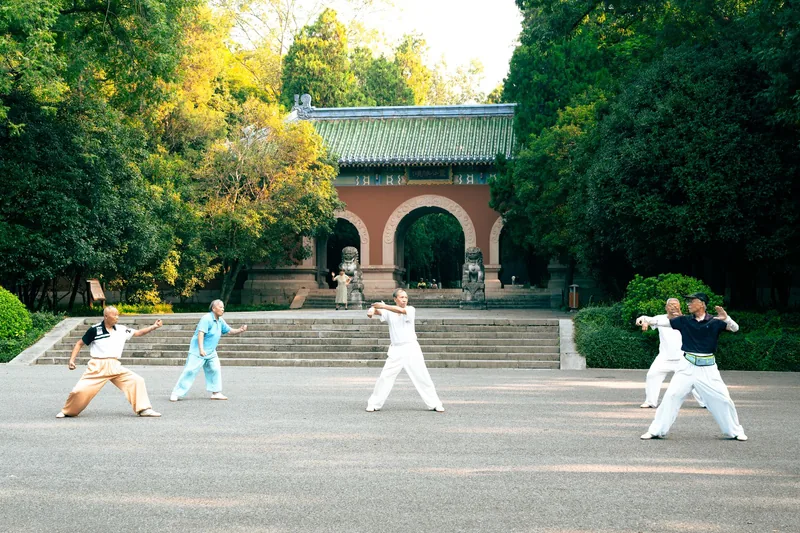
    Older adults practicing gentle tai chi movements to ease arthritis stiffness

    What the Research Says About Tai Chi for Arthritis

    This is one of the better-studied questions in exercise medicine, and the findings are unusually consistent. The landmark comparison came in 2016, when researchers published a 52-week randomized trial in Annals of Internal Medicine involving 204 adults with symptomatic knee osteoarthritis — mean age 60, about 70 percent women. Half were assigned to tai chi twice a week for 12 weeks; the other half received standard physical therapy. Tai chi produced improvements in pain and physical function comparable to physical therapy, with participants in the tai chi group also showing gains in depression scores and quality of life.

    That evidence has since shaped formal clinical guidance. The 2019 osteoarthritis management guideline from the American College of Rheumatology and the Arthritis Foundation strongly recommends tai chi for people with knee and hip osteoarthritis, placing it alongside exercise and self-management programs as a first-line, non-drug option. Strong recommendations in these guidelines are reserved for interventions with solid supporting evidence — a notable place for a 400-year-old martial art to land.

    There is also a purpose-built curriculum in wide circulation: the Tai Chi for Arthritis program, developed in 1997 by Dr. Paul Lam, a family physician who has arthritis himself. Built from Sun style movements with warm-up, breathing work, and specific precautions for painful joints, it is recognized as an evidence-based program by the Arthritis Foundation, the CDC, and the National Council on Aging.

    None of this makes tai chi a treatment for arthritis or a replacement for the care your doctor provides. What the evidence supports is more modest and more useful: as a form of regular movement for arthritic joints, it works about as well as anything else available, and most people find it far easier to stay with.

    Which Types of Arthritis Respond Best

    The strongest evidence by a wide margin covers knee osteoarthritis, which makes sense given how directly the practice loads and strengthens the muscles around the knee. Hip osteoarthritis is included in the same guideline recommendation. Studies have also examined tai chi in rheumatoid arthritis and fibromyalgia, where results have generally been encouraging for pain, function, and well-being, though the body of research is smaller.

    Practically speaking, the relevant question is usually less about your diagnosis than about your joints on a given day. Tai chi adapts easily. Stances can be raised so the knees bend less. Movements can be shortened, slowed, or performed seated. Students in an active flare often do a modified version of the same sequence everyone else is doing, then return to the full form once things settle — which matters, because consistency over months is where the benefit accumulates.

    Older adults tend to get compound value from the practice, since arthritis and fall risk so often travel together. Our guides to tai chi for seniors and tai chi for balance and fall prevention cover that side of it in more depth.

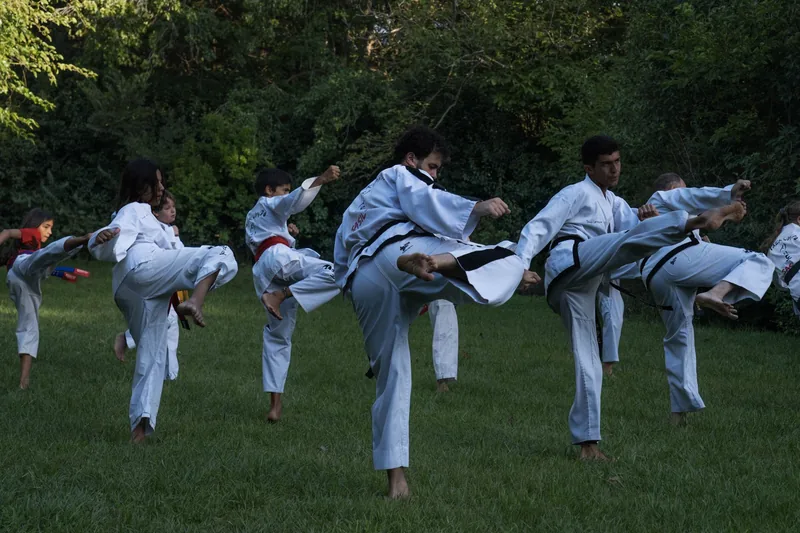
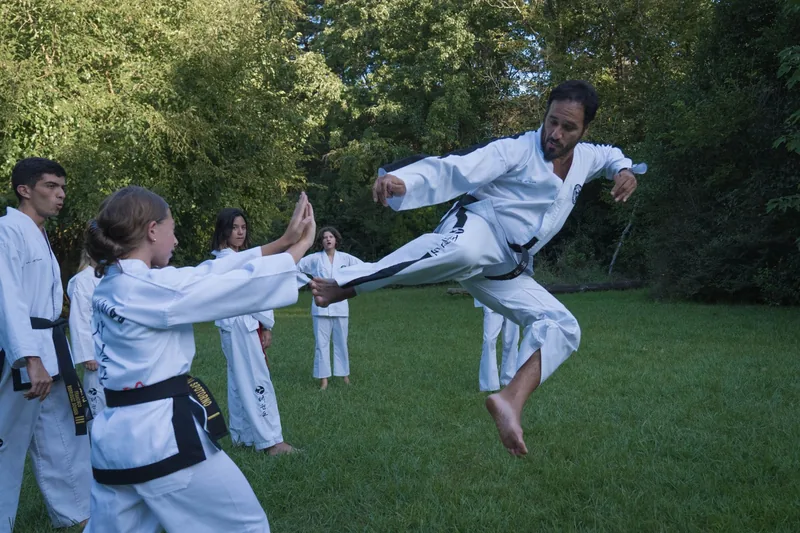
    Tai chi class practicing slow low-impact movements suitable for arthritis relief

    How to Start Tai Chi Safely with Arthritis

    Start with a conversation with your doctor or rheumatologist, particularly if you have had a joint replacement, an unstable joint, or significant inflammation. Tai chi is among the gentlest forms of exercise available, but a provider who knows your history can tell you what to favor and what to avoid.

    Then find an instructor rather than a video. Arthritic joints are unforgiving of poor alignment, and the single most common beginner error — letting the knee drift past the toes or collapse inward during a weight shift — puts load exactly where you least want it. An experienced instructor catches that in the first ten minutes. Learning from a screen, you might repeat it for months.

    Expect to go slower than you think you should. A reasonable starting point is two sessions a week, and the trials that documented benefit typically ran 12 weeks or longer, so give it a season before you judge it. Mild muscle soreness in the legs is normal early on; sharp or increasing joint pain is not, and it is a signal to raise your stance or scale the movement back rather than push through. Since joint comfort also depends on what happens outside class, some students pair training with recovery and joint-support nutrition — you can fuel your training with GMA Warrior Supplements.

    We teach traditional Yang Style tai chi, which emphasizes exactly the qualities that help arthritic joints: upright posture, controlled weight transfer, and relaxed continuous motion. Classes are small enough that instructors can modify movements individually, and GMA has been voted the top martial arts school in Sumner County by families who value that kind of attention. You can view our class schedule and try a class before committing to anything.

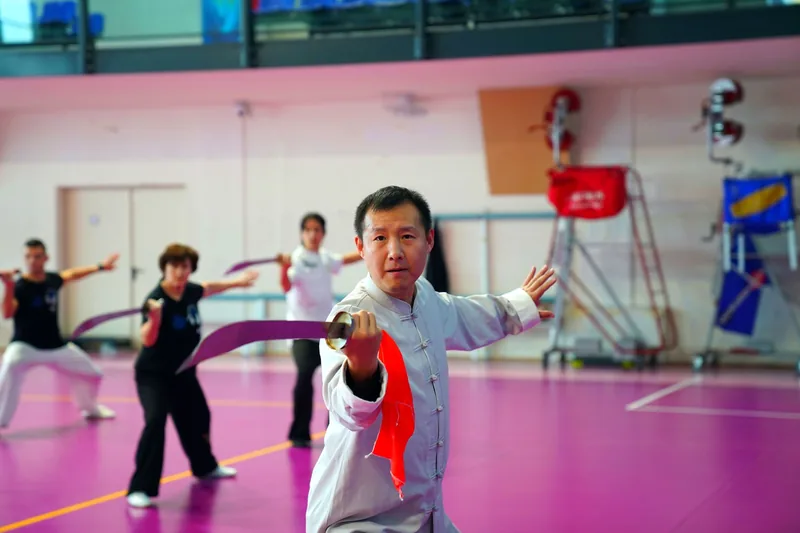
    Couple practicing gentle tai chi at home to maintain joint mobility with arthritis

    Ready to Get Started?

    Your first class is free. Whether you’re a complete beginner or an experienced martial artist, we’d love to welcome you to the GMA family.

    Call us at (731) 324-3847 or book your free trial online.

    Frequently Asked Questions

    How long before tai chi helps arthritis pain?

    Many students notice less morning stiffness within a few weeks, but the clinical trials that measured meaningful reductions in pain and improvements in function generally ran 12 weeks or longer with two sessions per week. Treat it as a practice you build over a season rather than a quick fix, and the improvements tend to hold as long as you keep practicing.

    Is tai chi safe if my knees already hurt?

    For most people with knee arthritis, yes — it is one of the few forms of weight-bearing exercise that strengthens the muscles around the knee without impact. The stance height is adjustable, so a painful knee simply bends less. Check with your doctor first if you have had a knee replacement or an unstable joint, and tell your instructor before class so movements can be modified from the start.

    Can I practice tai chi for arthritis while sitting down?

    Yes. Most of the upper-body movements translate directly to a seated version, and seated practice still delivers the range-of-motion, breathing, and relaxation benefits. Many students begin seated or use a chair for support during standing movements, then transition to full standing practice as strength and confidence return.

  • BJJ Moves: The Submissions Every Beginner Should Know

    BJJ Moves: The Submissions Every Beginner Should Know

    Every roll in Brazilian Jiu Jitsu ends one of two ways: the clock runs out, or somebody taps. The BJJ moves that produce that tap — the submissions — are what draw most people to the art in the first place. There are hundreds of them, and the beginner who tries to collect techniques instead of building a small, reliable set usually ends up with neither.

    This guide covers the submissions that actually matter in your first year on the mat: what separates a choke from a joint lock, which finishes have the highest success rates when it counts, what the rules let you attack at white and blue belt, and how to drill all of it without hurting the training partners you’ll need next week.

    What Counts as a Submission in BJJ?

    Strip away the names and every submission in jiu jitsu falls into one of two categories. Chokes (more accurately, strangles) restrict blood flow through the carotid arteries or, less often, air through the windpipe. Joint locks take a joint past its normal range of motion — the elbow, shoulder, knee, or ankle. That’s the whole menu. The hundreds of techniques you’ll eventually see are variations on those two ideas, applied from different positions.

    Which brings up the rule that governs all of it: position before submission. A finish applied from a position you can’t hold is a finish your opponent escapes. Beginners who chase the tap from unstable positions spend their first year getting swept and passed; the ones who learn to hold side control and back control first find that the submissions start appearing on their own. If you’re still building that base, our guide to the basic BJJ techniques every beginner should master covers the positions and escapes that come first.

    The Highest-Percentage BJJ Moves in Competition

    You don’t have to guess which submissions work. Competition data has been tracked for years, and it points in a consistent direction. Roughly 40% of professional-level BJJ matches end in a submission rather than on points — and a small handful of techniques account for most of those finishes.

    The rear naked choke sits at the top by a wide margin, accounting for around 45% of all submissions at the 2023 IBJJF World Championships. Beyond it, five techniques — the armbar, rear naked choke, triangle choke, guillotine, and kimura — together produce more than half of all recorded finishes. Collar chokes, available any time you’re training in the gi, post some of the highest completion rates of any attack in the sport.

    The practical takeaway for a white belt is unglamorous and worth taking seriously: the submissions that win world titles are the same ones taught in your first month. Depth beats breadth. Ten techniques you can hit on a resisting partner are worth more than fifty you’ve watched on video.

    Rear naked choke applied from back control, the highest-percentage of all BJJ moves

    Chokes: The Fastest Way to End a Roll

    A well-applied strangle doesn’t require strength and doesn’t care how tough your opponent is. Blood chokes work by compressing the carotid arteries on both sides of the neck, and they finish in seconds whether or not the person on the receiving end wants to continue. That’s precisely why they’re both the most effective and, when trained properly, among the safest submissions in the art.

    The rear naked choke. Taken from back control with your arm under the chin and your hands joined, it’s the finish every other choke is measured against. Because back control is the most dominant position in BJJ, the choke that lives there is also the hardest to defend.

    Collar chokes. Using your opponent’s own lapel as the tool, the cross collar choke and its cousins are available from guard, mount, and back control. They’re the reason gi training builds such precise grips.

    The triangle choke. Your legs encircle the neck and one arm from the guard, turning a bottom position into an attacking one. The guillotine catches the head and neck from the front, most often when an opponent shoots in poorly or postures down in your guard.

    One point of technique that matters more than any detail of the grip: chokes finish on the arteries, not the throat. If a training partner is coughing and grabbing their windpipe, the mechanics were wrong.

    Joint Locks and Leg Locks: What You’re Allowed to Attack

    Joint locks give you a second category of threat, and the arm attacks are where every beginner starts. The armbar isolates the arm between your legs and extends the elbow — it can be hit from mount, guard, and side control, which makes it the most versatile submission in the beginner toolkit. The kimura and americana attack the shoulder from opposite directions using a figure-four grip, and both are reliable from side control. Every one of these has a distinct point where the joint reaches its limit, and part of learning them is learning to feel that point in your partner before you pass it.

    Leg attacks are a different conversation, because the rules change with your belt. Under IBJJF competition rules, white belts (and the youth ranks below) may not apply leg locks at all. Blue and purple belts are limited to the straight ankle lock. Toe holds, kneebars, and calf slicers open up at brown and black belt, and heel hooks — the most dangerous of the group — remain illegal in gi competition at every belt, becoming legal only for adult brown and black belts in no-gi. Those restrictions exist because knee ligaments give very little warning before they tear. Respect them in the gym as well as at a tournament, and understand where your current rank sits within the BJJ belt ranking system before you start hunting legs.

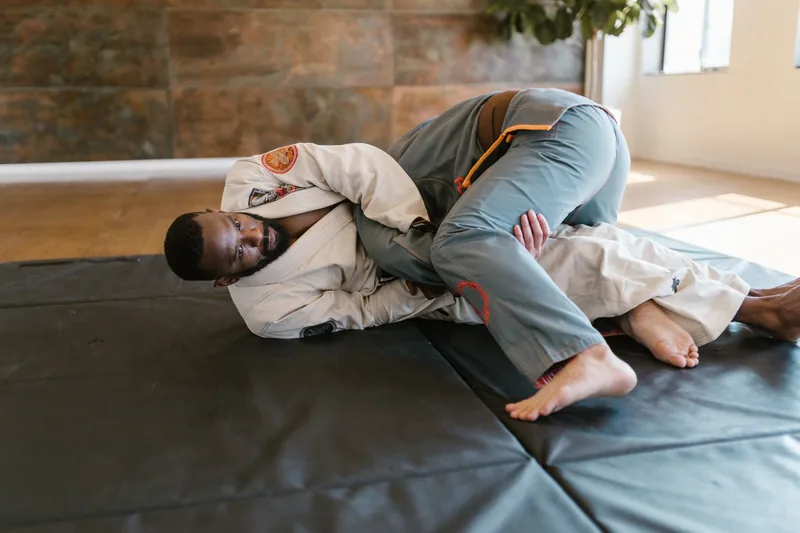
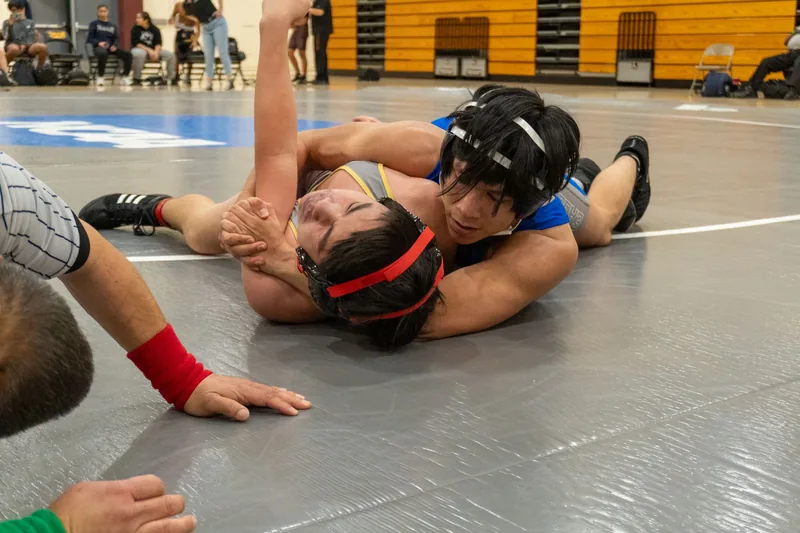
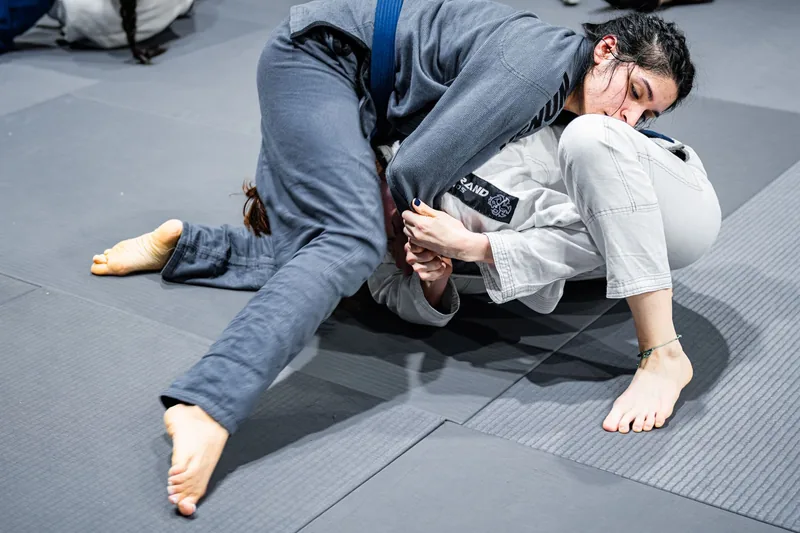
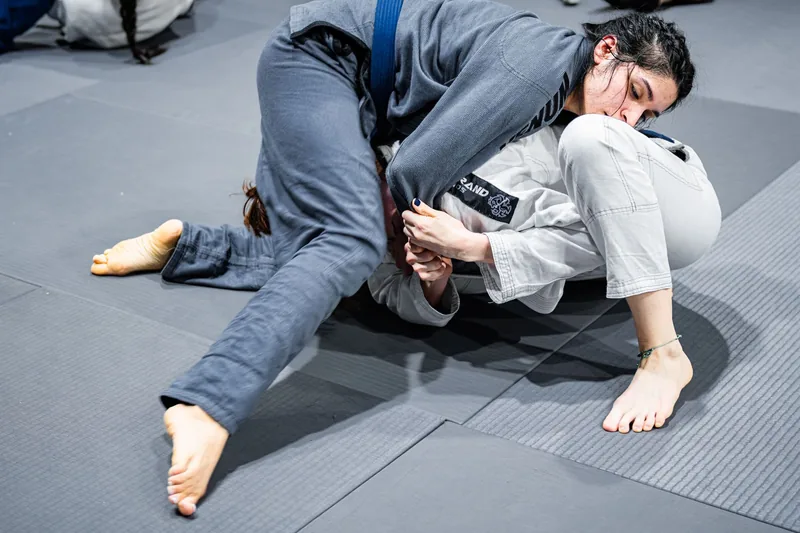
    Grapplers working an armbar, one of the first BJJ joint lock submissions beginners learn

    Learning BJJ Submissions Safely in Gallatin, TN

    Submissions are the only techniques in martial arts that let two people train at full intensity and walk away unharmed — but that depends entirely on the culture of the room. Tap early and tap often. A tap costs you thirty seconds; an ego costs you three months in a knee brace. On the applying end, take the finish slowly enough that your partner has time to respond, and release the instant they signal.

    The other half is structure. Drilling a submission on a compliant partner teaches the shape of it; hitting it in live rolling teaches the timing, the setup, and the reaction you need to read. You need both, in that order, which is why a real curriculum sequences them deliberately instead of leaving you to figure it out.

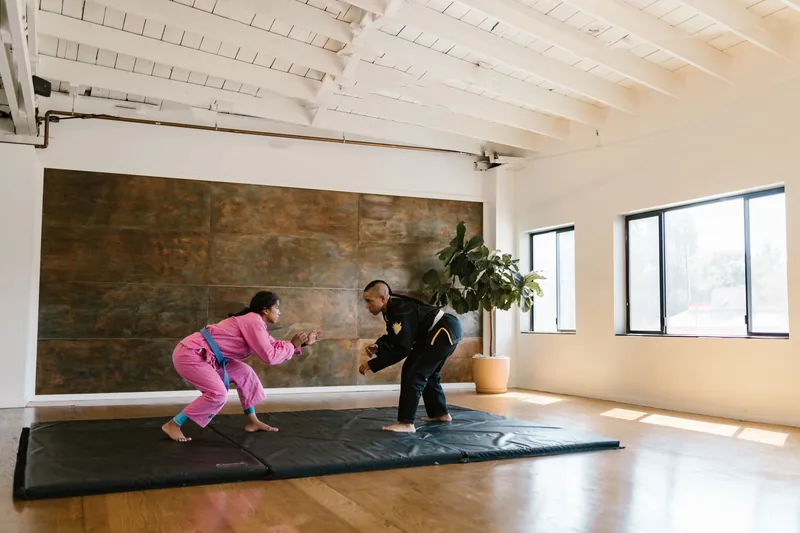
    Brazilian jiu jitsu students drilling BJJ submissions and grappling technique in class

    Our Brazilian Jiu Jitsu classes in Gallatin are taught under an authentic Gracie lineage by IBJJF-certified black belt instruction, backed by the 50+ years of martial arts experience behind Global Martial Arts USA. Beginners work a structured fundamentals track — positions and escapes first, then the high-percentage finishes above — before rolling in open mat. Competitors who want to take it further train through our dedicated program at GMA Team. And if BJJ is one of several things you’re weighing, explore our full class lineup — we teach eight disciplines under one roof in Sumner County.

    Ready to Get Started?

    Your first class is free. Whether you’re a complete beginner or an experienced martial artist, we’d love to welcome you to the GMA family.

    Call us at (731) 324-3847 or book your free trial online.

    Frequently Asked Questions

    What is the most common submission in BJJ?

    The rear naked choke, by a wide margin. It accounted for roughly 45% of all submissions at the 2023 IBJJF World Championships and is also the most-used finish in professional mixed martial arts. It’s applied from back control, which is the most dominant position in jiu jitsu.

    How many BJJ moves should a beginner learn?

    Far fewer than most people expect. A working set of five or six submissions — rear naked choke, armbar, triangle, kimura, americana, and a collar choke — will carry you through your entire white belt and most of blue. Competition data shows a small group of techniques produces the majority of finishes at every level.

    Are BJJ submissions dangerous to train?

    Trained correctly, they’re remarkably safe, because the tap gives both people a way to end the exchange before any damage occurs. Injuries in jiu jitsu almost always trace back to someone applying a technique explosively or refusing to tap. Leg locks carry the most risk, which is why competition rules restrict them by belt level.

  • BJJ vs Wrestling: Key Differences Explained

    BJJ vs Wrestling: Key Differences Explained

    The BJJ vs wrestling debate is one of the oldest arguments in grappling, and for good reason — both arts turn a standing confrontation into a ground battle, both reward technique and timing over raw size, and both build some of the toughest, most well-conditioned athletes on the planet. But the moment the fight hits the mat, they part ways completely. Wrestling is obsessed with the takedown and the pin; Brazilian Jiu Jitsu is built around control and the submission.

    At Global Martial Arts USA in Gallatin, TN, grappling is a core part of what we teach, and new students constantly ask how BJJ stacks up against wrestling. This guide breaks down where the two arts overlap, the fundamental difference in how they win, how scoring and rules diverge, why they treat the bottom position so differently, and why cross-training both is one of the smartest things a grappler can do.

    BJJ vs Wrestling: The Core Difference Is Takedowns vs. Submissions

    If you remember one thing about BJJ vs wrestling, make it this: wrestling wants to put you on your back and hold you there, while BJJ wants to submit you once the fight is on the ground. Everything else follows from that single distinction.

    Wrestling is built around the takedown. Single-legs, double-legs, high crotches, and throws are the bread and butter, and the entire objective is to force your opponent to the mat, establish top control, and — in folkstyle — pin their shoulders to the ground to end the match instantly. There are no chokes or joint locks in mainstream wrestling; dominance is expressed through position, pressure, and relentless conditioning.

    Brazilian Jiu Jitsu treats the takedown as just the doorway. Once the fight reaches the floor, a BJJ practitioner works to pass the legs, climb the positional ladder to mount or back control, and finish with a choke or joint lock. Where a wrestler is horrified to end up on their back, a BJJ player is perfectly comfortable there, using the guard to attack and sweep. If you’re new to the ground game, our guide on what Brazilian Jiu Jitsu is lays out the fundamentals.

    Wrestler shooting a takedown, illustrating the takedown focus in BJJ vs wrestling

    Wrestling Styles: Folkstyle, Freestyle, and Greco-Roman

    Part of what makes the BJJ vs wrestling comparison tricky is that “wrestling” isn’t one thing. There are three major competitive styles, each with its own rules. Folkstyle is what’s taught in American middle schools, high schools, and colleges, and it emphasizes control and riding time on top. Freestyle is the international Olympic version, allowing attacks on the legs and rewarding exposure — turning an opponent’s back to the mat. Greco-Roman is the most specialized: it bans all holds below the waist, so every takedown comes from upper-body throws, clinches, and brutal body locks.

    BJJ, by contrast, is far more standardized. Whether you train in a traditional gi or in the faster no-gi format with a rash guard and shorts, the positional hierarchy and submission-based objective stay the same. That consistency is one reason BJJ translates so cleanly into self-defense and mixed martial arts — the goal never changes, only the grips do.

    Scoring and Rules: Pins vs. Submissions

    The rulebooks make each art’s philosophy concrete. In wrestling, you score points for takedowns, escapes, reversals, and near-falls, and the ultimate prize is the pin — holding both of your opponent’s shoulders to the mat ends the match on the spot. In folkstyle, sustained top control even earns cumulative riding-time points. The clock is always ticking and stalling is penalized, so the pace is explosive and relentless.

    BJJ uses a points system that rewards ground control on the way to a finish: two points for a takedown or sweep, three for passing the guard, and four for reaching mount or back control. But points are secondary — a submission ends the match immediately, no matter the score. Because there’s no rush to stand back up and no pin to escape, BJJ matches unfold as long, chess-like exchanges on the floor that would be reset or scored entirely differently in wrestling. It’s a similar contrast to the one we cover in our breakdown of judo vs jiu jitsu, where throws and pins meet the ground game.

    Jiu jitsu practitioners grappling on the ground, showing BJJ's submission-focused ground game versus wrestling

    The Bottom-Position Divide

    Nowhere is the BJJ vs wrestling difference clearer than in how each art treats being on the bottom. In wrestling, your back touching the mat is close to a death sentence — it leads directly to a pin and a loss, so wrestlers spend enormous energy scrambling to avoid it and to escape back to their feet.

    In BJJ, the bottom is a place of opportunity. The guard — controlling an opponent from your back with your legs — is one of the most developed and dangerous positions in the entire art. A skilled BJJ practitioner will happily invite you into their guard to hunt for sweeps, chokes, and armbars. This is exactly why so many wrestlers who cross-train BJJ describe it as learning a new language: everything their sport taught them to fear, BJJ taught them to weaponize.

    Which Should You Train — and Why Not Both?

    There’s no universal winner in BJJ vs wrestling; the “better” art depends on your goals. Wrestling builds unmatched takedown power, top pressure, explosive athleticism, and a mentality of relentless forward pace. BJJ gives you a complete finishing system, the ability to stay dangerous even off your back, and a way for a smaller person to control and submit a larger attacker through leverage and patience — which is why it’s a cornerstone of modern self defense training.

    The two also complement each other beautifully. Wrestling’s takedowns dictate where a fight happens, and BJJ’s submissions decide how it ends — which is why the most complete grapplers, and nearly every high-level MMA fighter, train both. That’s the philosophy behind GMA’s approach: our Brazilian Jiu Jitsu classes in Gallatin carry a direct Gracie lineage and are led by IBJJF-certified black belt instructors, and our curriculum folds in the takedowns and top control that bring a fight to the ground — not just the ground game itself. Serious competitors can go deeper through our dedicated program at GMA Team, and anyone still deciding can explore our full class lineup of eight disciplines taught under one roof.

    Students cross-training grappling in a martial arts gym, blending wrestling takedowns with BJJ ground control

    Ready to Get Started?

    Your first class is free. Whether you’re a complete beginner or an experienced martial artist, we’d love to welcome you to the GMA family.

    Call us at (731) 324-3847 or book your free trial online.

    Frequently Asked Questions

    Is BJJ or wrestling better for a real fight?

    Both are excellent, and they cover different phases of a fight. Wrestling excels at controlling where the fight goes — taking an opponent down and staying on top — while Brazilian Jiu Jitsu excels once the fight is on the ground, giving a smaller person the tools to control and submit a larger attacker. The most effective answer is exposure to both, which is how we teach grappling at GMA in Gallatin, where our BJJ curriculum includes the takedowns that bring a fight to the mat.

    Does wrestling have submissions like BJJ?

    Mainstream folkstyle, freestyle, and Greco-Roman wrestling do not use chokes or joint locks — victory comes from takedowns, control, and pins. Submissions are the heart of Brazilian Jiu Jitsu instead. This is the single biggest reason wrestlers who add BJJ become so dangerous: they already own the takedown and top game, and BJJ adds the finishing tools they were missing.

    Can I start BJJ if I’ve never wrestled?

    Absolutely. The vast majority of BJJ students walk in with zero wrestling background, and the art is designed so that technique overcomes athleticism. Beginners learn positions, escapes, and basic submissions at a safe pace, and your takedowns develop naturally alongside your ground game. You can read more in our guide to the BJJ belt ranking system to see how progress is structured from white belt onward.

  • HapKiDo Techniques & Belt System: A Complete Guide

    HapKiDo Techniques & Belt System: A Complete Guide

    HapKiDo is one of the most complete self-defense systems in the martial arts world — a Korean art that blends dynamic kicks, close-range strikes, standing joint locks, and bone-breaking throws into a single, practical fighting system. If you want to understand the core HapKiDo techniques and how the belt ranking system tracks your progress from white belt to black, this guide breaks down exactly what you’ll learn and how you advance.

    At Global Martial Arts USA in Gallatin, TN, HapKiDo is taught as a real-world combat system — not a sport. Below, we cover the three guiding principles that make HapKiDo work, the essential techniques every student develops, and how the Gup and Dan belt structure maps your journey.

    The Three Core Principles of HapKiDo

    Every HapKiDo technique is built on three foundational principles. Understanding them is what separates memorizing moves from actually understanding the art.

    Hwa (harmony, or non-resistance): Rather than meeting force with force, a HapKiDo practitioner blends with an incoming attack and redirects it. This is why the art works regardless of size or strength — you’re never trying to overpower a larger opponent, only to control their momentum.

    Won (the circular principle): HapKiDo redirects and neutralizes attacks with circular, flowing motion instead of linear blocks. Circular movement lets you turn an opponent’s energy back against them while keeping your own balance and options open.

    Yu (the water principle): Like water, the HapKiDo student flows around resistance and conserves energy until the decisive moment. Soft where an attacker is hard, firm where they are weak — adapting continuously rather than committing to a single fixed response.

    HapKiDo self-defense techniques including a standing joint lock and control

    Essential HapKiDo Techniques

    HapKiDo is often described as covering every range of combat, and its curriculum reflects that. Where a striking art like TaeKwonDo focuses on kicks and punches, HapKiDo layers grappling, joint manipulation, and weapon defense on top of a strong striking base. These are the technique categories you’ll develop:

    Kicks and strikes: HapKiDo shares Korea’s love of dynamic kicking, adding spinning and jumping kicks at long range, then transitioning to elbows, knees, and hand strikes when the distance closes.

    Joint locks and pressure points: Wrist locks, arm bars, and pressure-point control are the signature of the art. These techniques let a smaller person control or immobilize a larger attacker by attacking the mechanical limits of a joint.

    Throws and takedowns: Using leverage and an opponent’s own balance, HapKiDo throws put an attacker on the ground while keeping you standing and in control — never a strength-against-strength contest.

    Weapon defense and training: Students learn to defend against knives, clubs, and firearms, and to train with traditional weapons such as the cane, short stick, bo staff, and sword. GMA’s program also drills disarming and weapon-removal techniques.

    Ground defense: Because real fights end up on the floor, GMA integrates foundational Gracie Brazilian Jiu-Jitsu so you’re never helpless if a confrontation goes to the ground. This multi-range coverage is exactly why HapKiDo consistently ranks among the best martial arts for self defense.

    Martial arts black belt marking the top of the HapKiDo belt ranking system

    The HapKiDo Belt System: Gup and Dan Ranks

    Like other Korean martial arts, HapKiDo uses a two-part ranking structure that mirrors the traditional system we use across all our Korean programs. If you’ve read our full guide to the martial arts belt ranking system, the framework will look familiar.

    Gup ranks (color belts): Beginners start at 10th Gup — the white belt — and count down toward 1st Gup, the most senior color belt. A typical progression runs white, through yellow, blue, and red belt stages, with each level adding new joint locks, throws, and self-defense combinations to your curriculum.

    Dan ranks (black belts): Once you earn your black belt, you enter the Dan system, which counts up — 1st Dan, 2nd Dan, and beyond. Each degree requires progressively more years of training, teaching, and refinement. The most senior Dan ranks are reserved for masters and grandmasters who have devoted decades to the art.

    Promotions are never automatic. Students test in front of qualified instructors and must demonstrate the techniques, self-defense applications, and understanding of Korean martial arts terminology required for each rank before advancing.

    How Long Does It Take to Earn a HapKiDo Black Belt?

    For a dedicated adult training consistently, reaching 1st Dan (black belt) in HapKiDo typically takes around three and a half to four years. There are no shortcuts — each Gup level carries a minimum time in rank plus curriculum and attendance requirements, and your instructors decide when you’re genuinely ready to test.

    That timeline reflects the depth of the art. By black belt, a HapKiDo student is fluent across striking, joint locks, throws, weapon defense, and ground control — a complete self-defense skill set rather than a single specialty.

    Students drilling HapKiDo throws and grappling techniques on the mat

    HapKiDo Training at GMA in Gallatin

    Global Martial Arts USA has taught Korean martial arts in Sumner County for over 50 years. Our HapKiDo program is a non-sport, commando-style combat system led by Master A. Davis and certified through top international HapKiDo organizations including the GHF, KHF, KKAHMA, and WCHF. Classes are open to students ages 12 and up, from complete beginners to experienced martial artists adding joint locks and weapon defense to their skill set.

    Because GMA teaches multiple disciplines under one roof, HapKiDo students can cross-train with TaeKwonDo, self defense, and BJJ to build a truly well-rounded game. You can view our class schedule to see when HapKiDo meets, and learn more about our instructors’ credentials and 50+ year history on our about page.

    Ready to Get Started?

    Your first class is free. Whether you’re a complete beginner or an experienced martial artist, we’d love to welcome you to the GMA family.

    Call us at (731) 324-3847 or book your free trial online.

    Frequently Asked Questions

    Is HapKiDo effective for real self-defense?

    Yes. HapKiDo was designed as a practical combat system rather than a sport, covering every range of a confrontation — long-range kicks, close-range strikes, standing joint locks and throws, weapon defense, and ground control. Because it relies on redirecting an attacker’s force rather than overpowering them, it works regardless of your size or strength.

    What’s the difference between HapKiDo and TaeKwonDo?

    TaeKwonDo is primarily a striking art focused on kicks and punches, with a strong sport and competition element. HapKiDo is a combat self-defense system that adds joint locks, throws, pressure points, and weapon defense. Many students at GMA train both, since the two arts complement each other well.

    How many belts are there in HapKiDo?

    HapKiDo uses the Korean Gup and Dan structure. Students progress through the color-belt Gup ranks — beginning at 10th Gup (white belt) and counting down to 1st Gup — before earning their 1st Dan black belt. From there, the Dan degrees count up as students continue advancing over many years of training.

  • Ip Man Technique & Legacy: The Grandmaster Who Shaped Wing Chun

    Ip Man Technique & Legacy: The Grandmaster Who Shaped Wing Chun

    Most people met him through a movie. Donnie Yen’s 2008 film turned a quiet Foshan gentleman into a global action icon — but the real Grandmaster Ip Man never threw a punch on screen. He did something more lasting: he took a closely guarded village art and taught it openly. The Ip Man technique that survives him isn’t a single move. It’s a way of thinking about structure, economy, and the centerline that still defines Wing Chun in every school teaching his lineage today.

    This guide covers who Ip Man actually was, what made his approach to Wing Chun distinct, how the Hong Kong years turned a regional style into a worldwide system, and why his most famous student changed martial arts a second time. It’s the history behind what students train in our Wing Chun program at Global Martial Arts USA in Gallatin, TN.

    Who Was Ip Man? From Foshan to Hong Kong

    Ip Man was born Ip Kai-man on October 1, 1893, in Foshan, Guangdong — a wealthy family in a city known for its martial arts culture. He began studying Wing Chun as a boy under Chan Wah-shun, becoming Chan’s sixteenth and final student. It was a short apprenticeship. Chan suffered a stroke in 1909 and retired to his village, leaving Ip with a foundation but not a finished art.

    The second half of his education came by accident. As a teenager, Ip moved to Hong Kong for school and encountered Leung Bik — the eldest son of Leung Jan, the legendary Foshan master who had taught Chan Wah-shun. Ip trained under Leung Bik until Leung’s death, and the experience reshaped what he thought he knew — he had learned the art from Leung Jan’s student, and was now learning it from Leung Jan’s son. The refinements from those years became the backbone of the system he would eventually teach.

    He returned to Foshan around 1916 and served as a police officer under the Nationalist government, teaching subordinates, friends, and relatives but never opening a formal school. For three decades, Ip Man was simply a skilled man who happened to know Wing Chun. That changed in 1949, when the Communist victory in the civil war sent him to Hong Kong at fifty-six years old, with almost nothing.

    Hong Kong street where Grandmaster Ip Man taught Wing Chun kung fu after 1949

    Ip Man Technique: What Made His Wing Chun Different

    Ip Man didn’t invent Wing Chun, and he never claimed to. What he did was strip it down and explain it — and that explanation is the real inheritance.

    The centerline as an organizing idea. Wing Chun’s core geometry says the shortest distance between you and your opponent is a straight line down the middle, and whoever controls that line controls the exchange. Ip Man taught it as a principle rather than a collection of techniques. Once a student understands the centerline, the individual hand shapes stop being separate things to memorize and become obvious answers to specific problems.

    Economy over force. Ip Man was not a large man, and his Wing Chun reflects it. Every movement in the system is measured against a simple test: does this do the job with less? Simultaneous attack and defense — one hand deflecting while the other strikes — exists because two actions in the time of one is the cheapest possible exchange. Power comes from structure and alignment, not from muscling through.

    Sensitivity instead of speed. The most distinctive part of the Ip Man technique is what happens on contact. Chi Sao — “sticky hands” — trains the arms to read pressure and respond before the eyes can process what happened. Reacting to what you see is always late. Reacting to what you feel is not. That tactile reflex is why Wing Chun works at conversational range, where most real confrontations happen.

    Teaching plainly. The quiet revolution was pedagogical. Traditional kung fu passed down through secrecy and ritual; Ip Man explained his art in ordinary language to ordinary people, and he explained why — the reasoning behind a movement, not just its shape. That’s the single reason Wing Chun spread while other village systems faded.

    Wing Chun practitioners training chi sao sensitivity drills from the Ip Man lineage system

    The Hong Kong Years: Teaching Wing Chun in the Open

    Ip Man began teaching in 1950 out of the Hong Kong Restaurant Workers’ Association union hall in Kowloon. His first students weren’t martial arts royalty — they were working men. Leung Sheung, Lok Yiu, Chu Shong-tin. He taught on a rooftop and in borrowed rooms, and he taught for money because he needed it.

    That ordinariness turned out to be the point. Because Ip Man taught anyone who showed up, Wing Chun escaped the closed-door lineage model that kept other systems small. By the 1960s his reputation had grown well past the union hall, drawing better-educated students who pressed him on the theory underneath the movements — and got real answers.

    In 1967, Ip Man and seven senior students founded the Ving Tsun Athletic Association, formalizing the art so it could be taught collectively rather than resting on one aging man. He died on December 2, 1972, of laryngeal cancer, in his flat on Tung Choi Street. Shortly before his death he filmed himself performing the forms — a last act of teaching, aimed at students he would never meet.

    Bruce Lee and the Ip Man Legacy

    A teenage Bruce Lee joined Ip Man’s classes in the mid-1950s, and Wing Chun became the foundation of everything he built afterward. Jeet Kune Do’s directness, its economy of motion, its insistence on stripping away what doesn’t work — that’s Ip Man’s thinking, carried forward and pushed further by a student who refused to stop questioning.

    Lee died seven months after his teacher, in 1973. The pairing is the most consequential teacher-student relationship in modern martial arts, and it cuts both ways: Lee made Wing Chun famous, but Wing Chun made Lee possible.

    Ip Man’s other students seeded the art worldwide — Wong Shun-leung built his reputation in Hong Kong’s rooftop challenge matches, and Ip’s sons Ip Chun and Ip Ching carried the family line forward. Every legitimate Wing Chun school today traces back through one of them to a man teaching restaurant workers in a borrowed room.

    Instructor teaching Wing Chun close-range trapping technique and centerline guard to a student

    Training the Ip Man Lineage at GMA

    Wing Chun at Global Martial Arts USA is taught under the Ip Man lineage system by Grandmaster W. Vardeman, as part of the Golden Talon Kung Fu curriculum. That lineage claim matters for a practical reason, not a romantic one: it means the material arrives with its reasoning attached. Students learn why the elbow stays down, why the stance turns instead of steps back, why the strike travels the line it does.

    The progression follows the system as Ip Man organized it — the three empty-hand forms (Sil Lum Tao, Chum Kiu, Biu Jee) building structure and power, Chi Sao developing the tactile reflex, and the Wing Chun wooden dummy integrating everything into applied sequences. Nothing gets skipped, because each stage is what makes the next one work.

    For students in Gallatin and across Sumner County, that history isn’t decoration. Wing Chun’s close-range focus makes it directly applicable to real self-defense situations, and it remains the only major martial art founded by a woman — Ng Mui, the Shaolin nun whose system Ip Man spent his life clarifying. After 50+ years teaching martial arts here, GMA teaches Wing Chun the way Ip Man intended: openly, with the reasons included. Read more about our instructors and lineage, or come see a class for yourself.

    Ready to Get Started?

    Your first class is free. Whether you’re a complete beginner or an experienced martial artist, we’d love to welcome you to the GMA family.

    Call us at (731) 324-3847 or book your free trial online.

    Frequently Asked Questions

    Was Ip Man really as skilled as the movies show?

    The Donnie Yen films are action dramas, not biography — the fight scenes and much of the plot are invented. The real Ip Man was genuinely respected as a Wing Chun master, but his historical importance comes from teaching, not fighting. He was the first to teach Wing Chun openly, explaining the reasoning behind the art rather than passing it down as secret ritual. That decision, not any duel, is why Wing Chun exists worldwide today.

    What is the most important Ip Man technique to learn first?

    Structure comes before any specific technique. The first form, Sil Lum Tao (“Little Idea”), teaches a stationary stance and the fundamental hand positions — beginners often find it frustrating because it looks like nothing is happening. That’s the lesson. Ip Man’s system builds alignment and the centerline concept first, because every strike, deflection, and trap that follows depends on them.

    Did Bruce Lee complete the Wing Chun system under Ip Man?

    No. Bruce Lee trained under Ip Man as a teenager in Hong Kong for several years but left for the United States before completing the full curriculum, including the wooden dummy form. He developed his Wing Chun foundation independently from there, eventually building Jeet Kune Do from it. Lee’s art was a departure from traditional Wing Chun — but its principles of directness and economy of motion came straight from Ip Man.

  • Judo vs Jiu Jitsu: Differences Explained

    Judo vs Jiu Jitsu: Differences Explained

    If you’re comparing grappling arts, the judo vs jiu jitsu question comes up fast — and the short answer is that they’re cousins with very different personalities. Judo wins the fight standing up with explosive throws; Brazilian Jiu Jitsu (BJJ) wins it on the ground with control and submissions. Both trace back to the same Japanese roots, both are practiced in a gi, and both reward technique over brute strength. But how they get the job done couldn’t be more different.

    At Global Martial Arts USA in Gallatin, TN, grappling is a core part of what we teach, and beginners constantly ask which art is “better.” This guide breaks down where the two come from, the core difference in how they fight, how competition and scoring work, and how their belt systems compare — so you can decide what fits your goals.

    Shared Roots: Where Judo and Jiu Jitsu Both Come From

    Judo and Brazilian Jiu Jitsu are branches of the same tree. Judo was founded in 1882 by Jigoro Kano, who refined the older Japanese battlefield art of jujutsu into a safer, sport-focused system he called Kodokan Judo. Kano’s genius was removing the most dangerous techniques so students could train full-speed against resisting partners — the same “live” training that makes both arts so effective today.

    Brazilian Jiu Jitsu grew directly out of judo. In the early 1900s, Kano sent one of his top students, Mitsuyo Maeda, abroad to spread the art. Maeda settled in Brazil and taught Carlos Gracie, whose family adapted the ground-fighting portion of judo into a system optimized for a smaller person to defeat a larger opponent. That family lineage is the story we cover in our history of the Gracie family and Brazilian Jiu Jitsu. So when people debate judo vs jiu jitsu, they’re really debating two paths that split from the same source about a century ago.

    Judo vs Jiu Jitsu: The Core Difference Is Throws vs. Ground Fighting

    If you remember one thing about judo vs jiu jitsu, make it this: judo is a stand-up art, and BJJ is a ground art. Everything else follows from that single distinction.

    Judo is built around nage-waza — throwing techniques. The entire objective is to use grips, timing, balance, and leverage to lift or sweep your opponent off their feet and slam them cleanly onto their back. Judo does include groundwork (newaza), but competition rules limit how long you can stay there, so training emphasizes the throw above all.

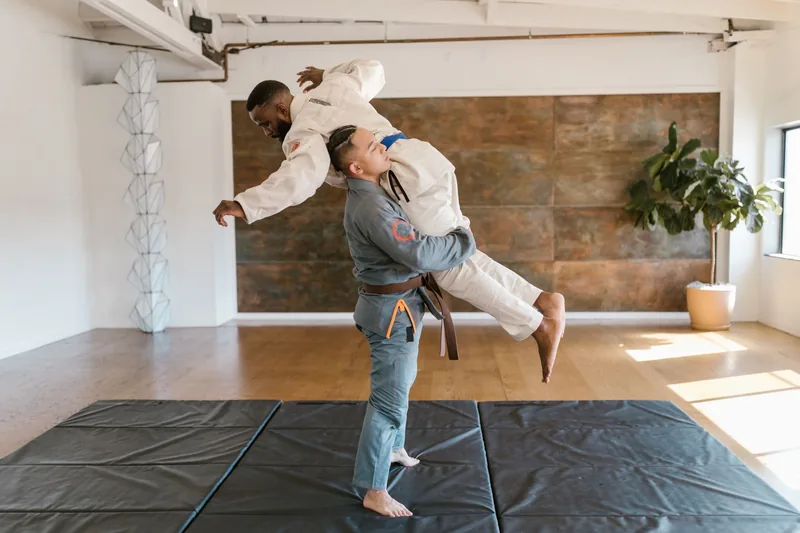
    Judo athletes executing a standing throw, showing the throwing focus in judo vs jiu jitsu

    Brazilian Jiu Jitsu flips the priority. A takedown or guard pull is just the doorway — the real match begins on the ground, where you work to pass your opponent’s legs, climb the positional ladder to mount or back control, and finish with a choke or joint lock. Where a judoka wants to end things in one decisive throw, a BJJ practitioner is content to bring the fight down and methodically dismantle their opponent’s defenses. If you’re new to the ground game, our guide on what Brazilian Jiu Jitsu is lays out the fundamentals.

    How Scoring and Competition Rules Differ

    The rulebooks make the philosophies concrete. In judo, the ultimate prize is ippon — a single, powerful, controlled throw that lands your opponent squarely on their back ends the match instantly. You can also score ippon with a 20-second pin or a submission, but the throw is king. If the action hits the mat and stalls, the referee stands both athletes back up within a few seconds to keep the pace high.

    BJJ uses a points system that rewards ground control. You earn points for advancing to dominant positions — two points for a takedown or sweep, three for passing the guard, four for reaching mount or back control. A submission ends the match immediately, no matter the score. Because there’s no rush to stand back up, BJJ matches allow long, chess-like exchanges on the floor that would be reset in judo.

    Brazilian jiu jitsu practitioners grappling on the ground, illustrating BJJ's ground-focused scoring

    Belt Systems and Time to Black Belt

    Both arts use colored belts to mark progress, but the pace is dramatically different. A dedicated judoka can often reach black belt in roughly four to six years. In BJJ, the adult ranks run white, blue, purple, brown, and black, and earning that black belt typically takes eight to twelve years of consistent training — one of the slowest, most demanding progressions in all of martial arts. The BJJ belt is famous precisely because it’s so hard to earn; you can read exactly how promotions work in our breakdown of the BJJ belt ranking system.

    That difference reflects each art’s emphasis. Judo’s ranking leans on standing skill and competitive results, while BJJ’s long road reflects the sheer volume of positions, escapes, and submissions a practitioner must master on the ground before the art considers them an expert.

    Which Should You Train — and Why Not Both?

    There’s no universal winner in judo vs jiu jitsu; the “better” art depends on what you want. Judo builds explosive power, exceptional balance, and the ability to end a confrontation the instant it starts — invaluable skills, especially on hard ground. BJJ gives you unmatched control once a fight goes to the floor, and a way for a smaller person to neutralize a stronger attacker through patience and leverage, which is why it’s a cornerstone of modern self defense training.

    The two also complement each other beautifully. Olympic judoka cross-train BJJ to sharpen their submissions, and elite BJJ competitors study judo to improve their takedowns. That’s the philosophy behind GMA’s approach: our Brazilian Jiu Jitsu classes in Gallatin carry a direct Gracie lineage and are led by IBJJF-certified black belt instructors, and our curriculum folds in the throws and takedowns that bring a fight to the ground — not just the ground game itself. Serious competitors can go deeper through our dedicated program at GMA Team, and anyone still deciding can explore our full class lineup of eight disciplines taught under one roof.

    Students in gi training grappling technique together in a martial arts class

    Ready to Get Started?

    Your first class is free. Whether you’re a complete beginner or an experienced martial artist, we’d love to welcome you to the GMA family.

    Call us at (731) 324-3847 or book your free trial online.

    Frequently Asked Questions

    Is judo or jiu jitsu better for self defense?

    Both are excellent, and they cover different ranges. Judo excels at controlling and slamming an attacker to the ground, which can end a threat instantly on hard pavement. Brazilian Jiu Jitsu excels once the fight is already on the ground, giving a smaller person the tools to control and submit a larger attacker. Many people find the ground control of BJJ the most reassuring, but the ideal answer is exposure to both — which is how we teach grappling at GMA in Gallatin.

    Is Brazilian Jiu Jitsu just the ground part of judo?

    Historically, that’s close to the truth. BJJ grew out of the newaza (ground-fighting) portion of Kodokan judo after Mitsuyo Maeda brought the art to Brazil. The Gracie family then spent decades refining, expanding, and pressure-testing that ground game into a complete system with far more positions, sweeps, and submissions than judo’s groundwork alone.

    Do you train in a gi for both judo and jiu jitsu?

    Yes. Both arts are traditionally practiced in a gi, and gripping the jacket and pants is central to setting up throws in judo and controlling positions in BJJ. BJJ also has a popular “no-gi” format using a rash guard and shorts, which changes the grips and speeds the pace up considerably.

  • Tai Chi for Weight Loss: Can It Really Work?

    Tai Chi for Weight Loss: Can It Really Work?

    Nobody starts tai chi expecting to sweat. The movements are slow, the breathing is quiet, and an entire hour can pass without your heart rate ever spiking — which is exactly why people are skeptical when they hear that tai chi for weight loss is a real strategy rather than wishful thinking. The surprise is that the research says otherwise, and the reason has less to do with how hard a workout feels and more to do with whether you’ll still be doing it a year from now. At Global Martial Arts USA in Gallatin, TN, we’ve watched students lose weight with this gentle art after high-intensity programs left them injured, exhausted, or simply bored.

    This guide covers how many calories tai chi actually burns, what a landmark clinical trial found about tai chi and belly fat, why a low-intensity practice can outperform a punishing one over time, and how to combine tai chi with nutrition to see real change.

    How Many Calories Does Tai Chi Burn?

    Let’s start with the honest math. The Compendium of Physical Activities — the reference researchers use to score exercise intensity — rates a general tai chi practice at roughly 3.0 METs, which places it in the same moderate range as a brisk-ish walk. For most adults that works out to somewhere around 200 to 275 calories in an hour of practice, depending on body weight and how deeply you sink into your stances.

    That number moves more than you’d think. A seated or very light practice drops toward 1.5 METs, while a lively, low-stanced Yang Style set can climb as high as 6.0 METs — genuinely vigorous territory. Depth of stance is the dial: the lower you sit into each posture, the harder your quadriceps, glutes, and core work to control the descent, and the more the practice starts to resemble a very slow set of weighted lunges.

    So tai chi will never outburn a spin class in a single session. What it does instead is give you an activity gentle enough to repeat three, four, or five times a week for years — and consistent moderate movement, sustained across time, is what actually changes body composition.

    What the Research Says About Tai Chi and Belly Fat

    The strongest evidence here comes from a three-group randomized controlled trial published in Annals of Internal Medicine in 2021. Researchers enrolled more than 500 adults aged 50 and older with central obesity and randomly assigned them to tai chi, conventional exercise (aerobic training plus strength work), or no exercise at all. Both exercise groups practiced one hour, three times a week, for twelve weeks.

    The finding that made headlines: tai chi reduced waist circumference about as effectively as conventional exercise, and both beat the no-exercise control group. The reduction also came with a favorable shift in HDL cholesterol — the “good” kind — though it did not produce detectable differences in fasting glucose or blood pressure over the study period.

    Read that carefully, because the claim is specific. This was a trial about central obesity and waistline, not a promise of dramatic scale weight loss, and the participants were middle-aged and older adults. Tai chi is not a metabolic miracle, and anyone managing obesity or a chronic condition should build a plan with a qualified healthcare provider. What the trial does establish is that a gentle, joint-friendly art can move the health markers that matter most — and it removes the excuse that slow movement doesn’t count as exercise.

    Older couple practicing a slow tai chi form outdoors as gentle exercise for weight loss

    Why Gentle Movement Beats Punishing Workouts Over Time

    The exercise that transforms your body is the exercise you keep doing. Most weight-loss plans fail not because the workouts were too easy but because they were too hard to sustain — the knees complain, the schedule slips, the motivation runs dry sometime in February. Tai chi sidesteps nearly all of that. There’s no impact on the joints, no equipment, no soreness that makes you dread tomorrow, and no fitness prerequisite to get started.

    There’s a second mechanism worth understanding. Chronic stress keeps cortisol elevated, and elevated cortisol is associated with appetite changes, poor sleep, and a tendency to store fat around the midsection. The deep diaphragmatic breathing at the heart of tai chi is one of the most reliable ways to shift the nervous system out of that alarm state — which is why our students so often report better sleep within a few weeks. The broader benefits of tai chi for stress, balance, and sleep quality aren’t separate from weight management. They’re part of the same picture.

    Then there’s the strength nobody expects. Holding a low stance while shifting weight from one leg to the other, slowly and under control, is real lower-body work. Over months, that builds the leg and core strength that makes walking farther, standing longer, and moving more throughout the day feel effortless — and that quiet increase in daily activity may matter more to your waistline than the calories burned in class.

    Students in a tai chi class practicing together, building the consistency that supports fat loss

    Pairing Tai Chi with Nutrition

    No amount of movement outruns a poor diet, and tai chi is no exception. Practicing three hours a week might account for 600 to 800 calories — meaningful, but modest against what most people eat in a single indulgent evening. Treat tai chi as the engine of consistency and let nutrition do the arithmetic.

    The good news is that tai chi seems to help on that side of the ledger too. The mindfulness the practice trains — noticing your breath, your posture, the exact moment your weight transfers from one foot to the other — is the same attention that catches you eating when you’re bored rather than hungry. Students frequently describe eating more deliberately without ever consciously deciding to diet.

    Build the basics around it: protein at every meal to protect the muscle you’re strengthening, whole foods over processed ones, and enough water that you’re not mistaking thirst for hunger. If you want to support recovery and training nutrition with something more structured, you can fuel your training with GMA Warrior Supplements.

    Woman preparing fresh fruit and vegetables, pairing nutrition with tai chi for weight loss

    Getting Started with Tai Chi for Weight Loss

    Aim for the dose used in the research: about an hour, three times a week. Consistency at that frequency, held for twelve weeks, is what produced measurable change — so protect the schedule before you worry about intensity.

    Once the movements are familiar, you can turn up the difficulty without turning up the impact. Sink your stances a little lower. Slow each transition down rather than speeding it up, since controlling a slow descent demands far more from the legs. Extend your practice from twenty minutes to forty. Every one of those adjustments raises the metabolic cost of a form that looks, from the outside, completely unchanged.

    Learning from a qualified instructor is what makes any of that possible. Proper alignment is the difference between a low stance that strengthens your knees and one that aggravates them, and a video can’t see your posture. GMA has been voted the top martial arts school in Sumner County, and our Tai Chi classes are taught in the traditional Yang Style by instructors with decades of experience starting adults from zero. If you’re brand new, our tai chi for beginners guide walks through everything to expect in that first hour. Then view our class schedule and come try it.

    Ready to Get Started?

    Your first class is free. Whether you’re a complete beginner or an experienced martial artist, we’d love to welcome you to the GMA family.

    Call us at (731) 324-3847 or book your free trial online.

    Frequently Asked Questions

    How long does it take to lose weight with tai chi?

    The clinical research used a twelve-week program of one-hour sessions three times a week, and that was enough to produce measurable reductions in waist circumference. Expect changes in how you feel — sleep, energy, joint comfort — within the first few weeks, and changes you can measure closer to the three-month mark. Weight loss depends heavily on nutrition alongside the practice.

    Is tai chi better than walking for weight loss?

    They burn calories at a broadly similar rate, so the better choice is the one you’ll actually stick with. Tai chi has two advantages worth weighing: it builds real lower-body strength and balance that walking doesn’t, and its breathing practice helps manage the stress and sleep problems that quietly undermine weight loss. Many students do both.

    Can overweight beginners start tai chi safely?

    Yes — this is one of tai chi’s genuine strengths. There is no jumping, no floor work, and no impact on the knees, hips, or spine, and every posture can be practiced at a height that suits you. If you have a chronic health condition or are significantly overweight, talk with your doctor first, then start with a beginner class where an instructor can adjust each stance to your body.

  • Basic BJJ Techniques Every Beginner Should Master

    Basic BJJ Techniques Every Beginner Should Master

    Walk into your first Brazilian Jiu Jitsu class and the sheer volume of moves can feel overwhelming — there are thousands of techniques, variations, and counters. But every black belt started by drilling the same short list of fundamentals. The basic BJJ techniques you learn in your first few months are the foundation everything else is built on, and mastering them matters far more than memorizing flashy submissions you saw online.

    At Global Martial Arts USA in Gallatin, TN, we’ve guided hundreds of beginners through their first steps on the mat. This guide breaks down the core positions, escapes, submissions, and sweeps every white belt should focus on — and why getting these right early sets the pace for everything to come.

    What Are the Basic BJJ Techniques Every Beginner Should Learn?

    The basic BJJ techniques fall into four buckets: positions (where you want to be), escapes (how to get out of bad spots), submissions (how to finish), and sweeps (how to reverse a bad position into a good one). Beginners who spend their first six months building a real foundation in these four areas progress far faster than those who chase advanced moves before they can hold a stable position.

    Here’s the principle that makes it all work: in BJJ, position comes before submission. You establish control first, then hunt the finish. Rushing a choke or armbar from a weak spot is the single most common beginner mistake — and learning to be patient is itself one of the most important skills you’ll develop. If you’re brand new to the art entirely, our guide on what Brazilian Jiu Jitsu is covers the bigger picture before you dive into the moves below.

    Fundamental Positions: Guard, Mount, Side Control, and Back Control

    Before you can submit anyone, you have to understand the positional hierarchy. These four positions are the map of every roll:

    The guard. Fighting off your back is the cornerstone of BJJ, and it’s what most sets the art apart. From closed guard — legs wrapped around your opponent’s waist — you can control a bigger opponent, defend, and attack, all while underneath them. Learning to be dangerous from your back is a beginner’s first real breakthrough.

    The mount. Sitting on your opponent’s chest is a dominant top position that opens up submissions and strikes while giving them very little to work with. Side control puts you perpendicular across their torso, pinning their upper body and setting up transitions to mount or submissions. And back control — chest to their back with your heels hooked inside their thighs — is the single most dominant position in BJJ, because they can’t see what you’re doing and the rear naked choke is waiting.

    Beginners drilling basic BJJ techniques and ground positions on the mat

    The Two Movements That Unlock Everything: Shrimping and Bridging

    Ask any experienced coach and they’ll tell you the same thing: the two most valuable movements for a beginner aren’t submissions at all. They’re escapes — and they underpin nearly everything else you’ll do.

    The hip escape (shrimping). This is the most important movement in BJJ. By planting a foot and pushing your hips out to create space between you and your opponent, you recover guard, escape pins, and defend submissions. Almost every escape and guard retention technique is built on top of shrimping, which is why most schools drill it in the warm-up of every single class.

    The bridge and roll (upa). The classic escape from under the mount: trap your opponent’s arm, plant your feet close to your hips, bridge explosively upward, and roll them over your shoulder to end up in their guard. Together, shrimping and bridging give you a way out of the two worst positions a beginner ends up in — and the confidence that comes from knowing you can escape is what lets you relax and actually learn.

    Beginner Submissions: Your First Finishes

    Once you can hold position and escape trouble, you earn the right to finish. These are the highest-percentage submissions for beginners because they’re mechanically simple and work at every level:

    Rear naked choke. Applied from back control, you slide one arm under the chin, grip your own bicep, and squeeze. It attacks the arteries, not the windpipe, so it’s both safe to train and devastatingly effective — it’s the most reliable finish in all of BJJ.

    The armbar. Hyperextending the elbow by trapping the arm between your legs, the armbar can be hit from mount, guard, and side control — making it one of the most versatile submissions to learn early.

    The triangle choke and shoulder locks. The triangle uses your legs to encircle your opponent’s neck and one arm from the guard. The kimura and americana — two shoulder locks — can be applied from guard, mount, and side control, rounding out a beginner’s core arsenal. In training you’ll “tap” the moment a submission is locked in; tapping is how everyone stays healthy enough to train for decades, not a mark of failure.

    Two grapplers working a basic BJJ submission during live sparring

    Sweeps: Turning a Bad Position into a Good One

    A sweep reverses the situation — you go from being underneath to being on top. For beginners, the scissor sweep is the classic starting point. From closed guard, you control a collar and sleeve, place one shin across your opponent’s belly, and scissor your legs while pulling them forward to roll them over and come up into mount.

    Sweeps teach a lesson that defines good jiu jitsu: being on the bottom isn’t the same as losing. A skilled guard player is constantly threatening to reverse the position, and that threat is what makes the guard such a powerful equalizer for smaller practitioners. Mastering a few reliable sweeps is what turns your guard from a place you survive into a place you attack from — and it’s a major milestone on the road through the BJJ belt ranking system.

    Learning Basic BJJ Techniques at Global Martial Arts USA in Gallatin

    Techniques on a screen only get you so far. What accelerates a beginner is structured, progressive instruction from coaches who know how to build skills in the right order — and a training environment where you can drill safely with partners at your level.

    Our Brazilian Jiu Jitsu classes in Gallatin carry a direct Gracie lineage and are taught by IBJJF-certified black belt instructors, backed by 50+ years of martial arts experience at GMA. Beginners start with a structured fundamentals curriculum — the exact positions, escapes, and submissions covered above — before rolling in open mat, so you’re never thrown in the deep end.

    Brazilian jiu jitsu beginner class practicing fundamental grappling technique at GMA

    Students who catch the competition bug can pursue that path through our dedicated program at GMA Team, where serious competitors train under structured preparation. And if you’re still deciding where to start, explore our full class lineup — BJJ is one of eight disciplines we teach under one roof in Gallatin.

    Ready to Get Started?

    Your first class is free. Whether you’re a complete beginner or an experienced martial artist, we’d love to welcome you to the GMA family.

    Call us at (731) 324-3847 or book your free trial online.

    Frequently Asked Questions

    What is the first BJJ technique a beginner should learn?

    The hip escape, or “shrimping,” is usually the very first thing you’ll drill — often in the warm-up of every class. It’s the foundational movement behind nearly every escape and guard recovery in BJJ, which is why coaches prioritize it before any submission.

    How long does it take to learn the basic BJJ techniques?

    Most students gain a working grasp of the fundamental positions, escapes, and a handful of submissions within their first three to six months of consistent training. True comfort comes with mat time — but you’ll be able to survive and defend yourself on the ground long before you earn your blue belt.

    Do I need to be in shape to start learning BJJ?

    No. Most beginners are winded after the first warm-up, and that’s completely normal. BJJ itself builds your conditioning over time. Show up as you are, focus on technique over strength, and the fitness follows naturally.

  • Travel Safety Tips: How to Stay Safe Anywhere

    Travel Safety Tips: How to Stay Safe Anywhere

    Whether you’re flying overseas, road-tripping to a new city, or heading out for a weekend trip, the best travel safety tips have less to do with fear and more to do with preparation. A little planning before you leave — and a habit of staying aware once you arrive — keeps the overwhelming majority of travel problems from ever happening. At Global Martial Arts USA in Gallatin, TN, our instructors have spent more than 50 years teaching students that awareness is the skill that prevents trouble long before it starts, and that principle travels with you anywhere.

    This guide walks through practical travel safety for every stage of a trip: how to prepare before you go, how to stay secure at your hotel, how to move through an unfamiliar place with confidence, and how to protect your documents and information. None of it requires a black belt — just attention and a few smart habits.

    Before You Go: Travel Safety Starts at Home

    Most of your safety is decided before you ever leave your driveway. Research your destination ahead of time — neighborhoods to favor, areas to avoid after dark, local emergency numbers, and the address of the nearest hospital or embassy. Knowing these details in advance means you’re never scrambling for them in a stressful moment.

    Share your itinerary with someone you trust at home, including flight numbers, hotel details, and rough daily plans. Set up a simple check-in schedule so someone always knows roughly where you should be. If you’re traveling internationally, enroll for free in the U.S. State Department’s Smart Traveler Enrollment Program (STEP) at step.state.gov — it sends you safety, weather, and security alerts from the nearest U.S. embassy and helps officials reach you in an emergency.

    Finally, make copies of your important documents. Photograph your passport, ID, and travel insurance, store them in a secure cloud folder, and leave a printed copy with your emergency contact. If your wallet or bag ever goes missing, replacing everything is far easier when the records already exist.

    Traveler organizing passport and documents before a trip following travel safety tips

    Staying Safe at Your Hotel or Lodging

    Your hotel is your home base, so treat it like one. When you can, request a room between the second and fourth floor. That range is high enough to discourage easy ground-floor break-ins through a window, yet low enough that fire-truck ladders can still reach you — most ladders top out around the fourth floor. It’s a small request that stacks the odds in your favor.

    As soon as you check in, get oriented. Locate the two nearest stairwells and count the doors between your room and the exit, because in a real emergency the hallway may be dark or smoky. Read the evacuation map on the back of the door, and note where the fire alarms and extinguishers are. Once you’re in the room, always use the deadbolt and the secondary latch or chain — the automatic door lock alone is not enough.

    Keep valuables in the in-room safe or with you, never loose on a nightstand, and hang the “Do Not Disturb” sign when you’re out to suggest the room is occupied. These are the same situational-awareness instincts we drill in our self defense classes: know your exits, control your space, and never assume a place is safe just because it looks calm.

    Everyday Travel Safety Tips for Getting Around

    Once you’re exploring, the goal is to look like you belong. Attackers and pickpockets look for easy targets — people who are distracted, lost, or obviously flashing valuables. These are the travel safety tips that pay off the moment you step outside:

    Blend in. Dress simply, leave expensive jewelry and watches at home, and check maps discreetly on your phone or duck into a shop rather than standing on a corner looking confused. Confident, purposeful movement alone discourages most trouble.

    Guard your money and valuables. Split your cash and cards between two locations — some in a front pocket or money belt, a backup stashed in your bag. Carry bags across your body with the zipper facing in, and stay especially alert in crowds, on public transit, and at tourist hotspots where pickpockets work.

    Use transportation wisely. Stick to licensed taxis or trusted rideshare apps, and before you get in, confirm the driver’s name, the car model, and the license plate. Share the trip with a friend and sit in the back seat for the easiest exit. Trust your instincts — if a ride, a street, or a situation feels wrong, don’t get in, and leave.

    Tourist checking directions on a busy street while staying aware of surroundings for travel safety

    Protecting Your Documents and Digital Information

    Modern travel safety isn’t only physical. Keep your passport and primary ID secured in your hotel safe and carry a copy plus a secondary form of ID when you’re out. That way a lost or stolen wallet doesn’t strand you without proof of who you are.

    Be cautious with public Wi-Fi. Open networks at airports, cafes, and hotels are easy places for someone to intercept your data, so avoid logging into banking or entering passwords unless you’re using a trusted VPN or your own cellular connection. Enable a screen lock and “find my device” tracking on your phone before you leave, and back up your photos and files to the cloud so a lost device is an inconvenience, not a disaster.

    Watch out for common scams, too. Overly friendly strangers who create a distraction, “official” requests for your documents on the street, or too-good-to-be-true deals are red flags in any city. When something feels off, that instinct is your brain processing danger faster than your conscious mind can — act on it.

    How Training Prepares You to Travel Confidently

    Everything on this list comes back to one skill: awareness. The traveler who notices the exits, reads the room, and carries themselves with quiet confidence is a far harder target than someone lost in their phone. That mindset is exactly what consistent martial arts training builds — and it’s the same foundation we cover in depth in our guide to personal safety and situational awareness.

    Students practicing self defense awareness drills in a martial arts class that supports travel safety

    Our program draws from multiple disciplines — TaeKwonDo for striking and distance, HapKiDo for joint locks and control, and Brazilian Jiu Jitsu for ground defense — refined over 50+ years by our instructors in Gallatin. If you’re weighing which style fits you, our comparison of the best martial art for self defense breaks down the options. You don’t need to be an expert to travel safely, but the confidence and reflexes that training builds make every one of these habits more reliable when it counts.

    Whether your next trip is across the state or across the world, these principles are ones you can start practicing today — at the airport, in the hotel, and on every street in between.

    Ready to Get Started?

    Your first class is free. Whether you’re a complete beginner or an experienced martial artist, we’d love to welcome you to the GMA family.

    Call us at (731) 324-3847 or book your free trial online.

    Frequently Asked Questions

    What are the most important travel safety tips?

    Preparation and awareness matter most. Research your destination, share your itinerary with someone at home, secure copies of your documents, and stay alert to your surroundings once you arrive. Most travel problems are avoidable when you plan ahead and notice trouble developing early, long before any physical confrontation.

    What floor should I request at a hotel for safety?

    Aim for a room between the second and fourth floor. That range is high enough to deter easy ground-floor break-ins through a window, but low enough that fire-truck ladders — which usually reach only to about the fourth floor — can still get to you in an emergency. Always locate the nearest stairwells when you check in.

    Do I need self defense training to travel safely?

    No. The awareness habits and travel safety tips in this guide require no training and work for everyone. That said, regular martial arts practice sharpens your situational awareness and builds the confidence and reflexes that make these habits far more reliable under real stress, which is why many students start with a free trial class at GMA.

  • Personal Safety Tips & Situational Awareness Guide

    Personal Safety Tips & Situational Awareness Guide

    The best personal safety tips have nothing to do with throwing a punch. Real safety starts in your head — with how you carry yourself, how you read a room, and how early you notice when something is off. At Global Martial Arts USA in Gallatin, TN, our instructors have spent more than 50 years teaching students that awareness is the skill that prevents trouble long before any physical confrontation begins.

    This guide breaks down situational awareness into something you can actually use: the four levels of alertness, practical habits for everyday life, and how to trust the instincts that keep you safe. None of it requires a black belt — just attention and a little practice.

    What Situational Awareness Really Means

    Situational awareness is simply paying active attention to your environment and the people in it. It’s noticing who is around you, where the exits are, and whether a situation feels right before it has a chance to become dangerous. It’s the foundation of everything we teach in our self defense classes, because the overwhelming majority of bad outcomes are avoidable when you see them coming.

    Attackers and opportunists look for easy targets — people distracted by their phones, wearing headphones in both ears, or moving through the world without paying attention. When you look alert and engaged, you stop fitting that profile. We tell our students to “read the room before the room reads you.” That single habit does more for your safety than any technique.

    The goal isn’t to live in fear or treat every stranger as a threat. It’s the opposite: awareness lets you relax because you’re informed. You know your surroundings, so you can enjoy them without being caught off guard.

    Woman walking alert on a city street practicing situational awareness for personal safety

    The Four Levels of Awareness (Cooper’s Color Code)

    One of the most useful frameworks for understanding awareness was developed by Jeff Cooper, a U.S. Marine, and it has been used to train military and law enforcement for decades. Known as the Cooper Color Code, it sorts your mental state into four levels — and the goal is simply to spend your time in the right one.

    Condition White is total switched-off — completely unaware of your surroundings. This is scrolling your phone while walking, or sitting in a parked car lost in thought. White is fine when you’re safe at home with the doors locked, but out in the world it makes you an easy target.

    Condition Yellow is relaxed alertness, and it’s where you want to live whenever you’re out in public. You’re not paranoid or tense — you’re just calmly aware. You notice who comes and goes, you clock the exits, and nothing surprises you. You can stay in Yellow indefinitely without stress.

    Condition Orange is heightened focus on a specific possible threat. You’ve spotted something that doesn’t add up — a person following you, someone approaching too fast — and you start forming a plan. What would I do if this goes wrong? Where’s my exit?

    Condition Red is action. The threat is real and you respond — escape, shout for help, or defend yourself. Because you moved through Yellow and Orange first, you reach Red already prepared instead of frozen in shock.

    Everyday Personal Safety Tips That Actually Work

    Awareness becomes powerful when you build it into ordinary routines. These are the personal safety tips we share most often with new students, because they require zero training and pay off immediately.

    In parking lots and garages: Have your keys in hand before you leave the building. Scan the area as you walk, check the back seat before getting in, and park near lights and foot traffic when you can. If someone is loitering near your car, don’t approach — go back inside and ask for an escort.

    Walking alone: Stay on well-lit, populated routes and walk with purpose. Keep at least one ear free of headphones. If you think you’re being followed, cross the street, change direction, or step into any open business. Confident body language alone discourages most would-be attackers.

    With rideshares and taxis: Confirm the driver’s name, the car model, and the license plate before you get in. Share your trip with a friend, and sit in the back on the passenger side for the easiest exit.

    At home: Keep doors locked even while you’re inside, and verify anyone before opening up. If you come home to a door ajar or a broken window, don’t go in — call for help from your car or a neighbor’s.

    Person walking through a parking area at night staying aware of surroundings for personal safety

    Trust Your Instincts and Use the OODA Loop

    That uneasy feeling when something is “off” is not paranoia — it’s your brain processing danger signals faster than your conscious mind can explain them. One of the most important personal safety lessons we teach is simple: trust that feeling and act on it. Cross the street, leave the venue, or make the call. You never owe a stranger your politeness at the expense of your safety.

    A helpful way to think about responding under pressure is the OODA loop — Observe, Orient, Decide, Act — a decision-making cycle developed by U.S. Air Force Colonel John Boyd. You observe what’s happening, orient by making sense of it, decide on a response, and act. Then you start the loop again with fresh information. Staying in Condition Yellow keeps that loop running smoothly, so when a real threat appears you’re already several steps ahead of it.

    De-escalation is part of this too. If someone confronts you, a firm verbal boundary — facing them, hands up at chest height, saying “Back up” in a clear voice — often ends the situation before it escalates. Walking away from a heated argument isn’t weakness; it’s the smartest move you can make. The students in our HapKiDo program learn to control a situation before it ever controls them.

    How Training Sharpens Your Awareness

    Reading about personal safety is a strong start, but under real stress your body defaults to what it has rehearsed. That’s why students who train regularly respond faster, think more clearly, and carry themselves with a quiet confidence that discourages trouble in the first place. Awareness, boundary-setting, and physical response all get sharper with practice.

    Students practicing self defense techniques in a martial arts class to build personal safety skills

    Our program draws from multiple disciplines — TaeKwonDo for striking and distance management, HapKiDo for joint locks and control, and Brazilian Jiu Jitsu for ground defense. This multi-discipline approach, refined over 50+ years by our instructors in Gallatin, gives students a well-rounded skill set for real situations. If you’re weighing which style fits you, our guide to the best martial art for self defense breaks down the options, and our overview of practical self defense knowledge goes deeper on the everyday fundamentals.

    Whether you’re a current student sharpening your awareness or someone considering training for the first time, the principles in this guide are ones you can start using today — and they only get stronger when you train them.

    Ready to Get Started?

    Your first class is free. Whether you’re a complete beginner or an experienced martial artist, we’d love to welcome you to the GMA family.

    Call us at (731) 324-3847 or book your free trial online.

    Frequently Asked Questions

    What is the most important personal safety skill?

    Situational awareness. Staying alert to your surroundings, noticing exits, and recognizing when something feels wrong prevents far more dangerous situations than any physical technique. Most threats can be avoided entirely when you see them developing and act early.

    How do I improve my situational awareness day to day?

    Aim to spend your time in public in “Condition Yellow” — relaxed but aware. Keep your head up, limit phone and headphone distractions, scan for exits when you enter a space, and trust your instincts the moment something feels off. With a little practice these habits become automatic.

    Do I need martial arts training to stay safe?

    No. The awareness habits and personal safety tips in this guide are available to everyone and require no training. That said, regular practice builds the muscle memory and confidence that make these skills far more reliable under real stress, which is why so many students start with a free trial class at GMA.